Connectors now route automatically, attach neatly and label easily

Connectors in draw.io can now automatically route around shapes and will update their paths whenever you move, rotate or resize any elements in your diagram. When you now attach connectors to shapes with rounded corners, they will attach neatly to the line and not to the squared perimeter.
Labels have also been improved - drag and drop a text element from the shape library onto a connector to add a label, copy and paste connector labels, and set label backgrounds to use the coloured page background (if set).
Connector paths update automatically
Manually repositioning connectors to make your diagram more readable is one of the more time-consuming tasks. Use auto-routing to ensure connectors neatly avoid shapes on the canvas, and Follow Terminals to move connector waypoints with their connected shapes.
Route connectors around shapes
Auto-routed connectors follow a path using right-angled bends that never overlap another shape.
- Select one or more connectors.
- Click Waypoints in the Style tab of the format panel.
- Select Auto-route around shapes.
The connector will automatically draw a new path whenever you move, resize, align, distribute or rotate a connected shape, move a shape onto or off its path, or apply a layout. While you drag a shape, a preview will show the new path of each auto-routed connector.
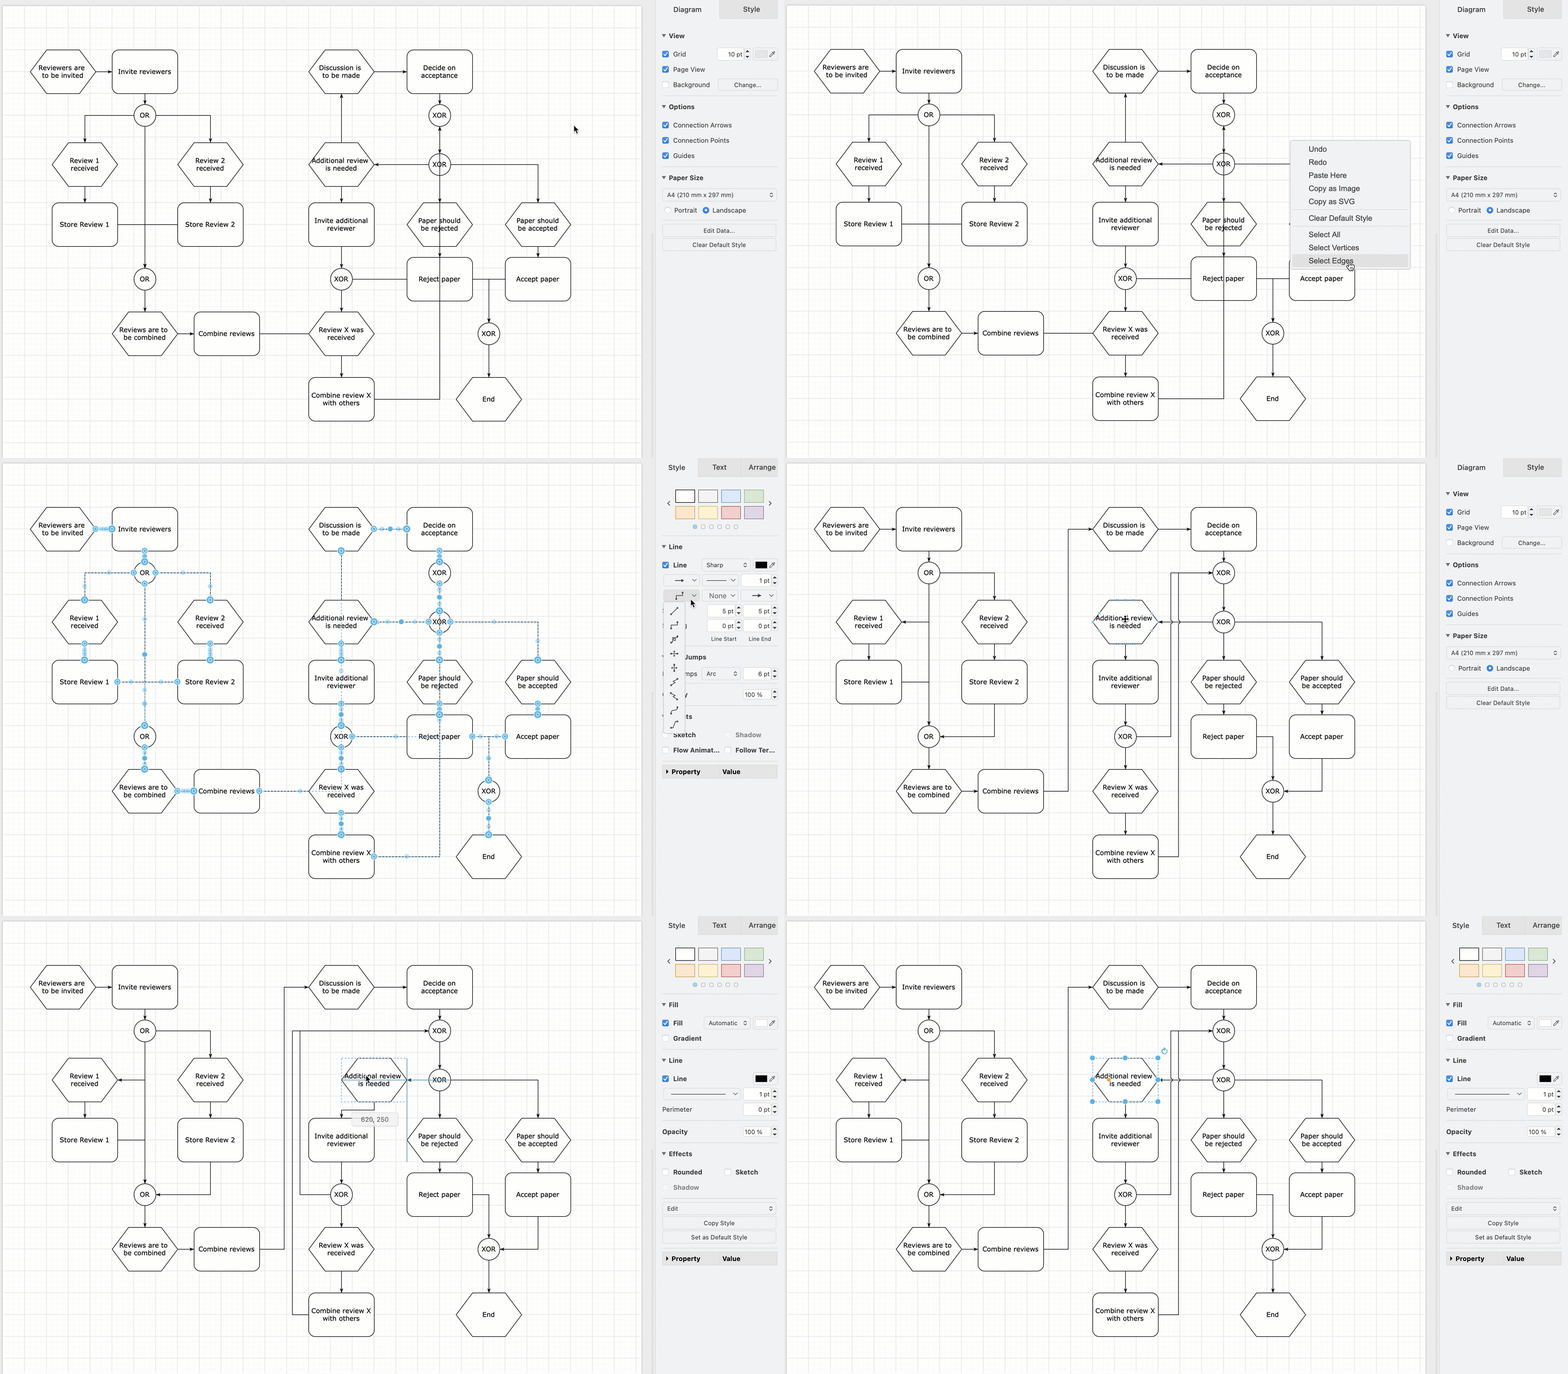
Drag the connector to set its path by hand and disable auto-routing for that connector. Learn more about auto-routing connectors.
Note: Diagrams generated by AI using the draw.io MCP server can also use auto-routed connectors.
Move waypoints with the connected shapes
Waypoints normally stay in place when you move a connected shape, which can result in long and convoluted connector paths. Turn on Follow Terminals to move the connector waypoints with the shapes instead.
- Select the connector.
- Open the Effects section in the Style tab of the format panel.
- Select the Follow Terminals checkbox.
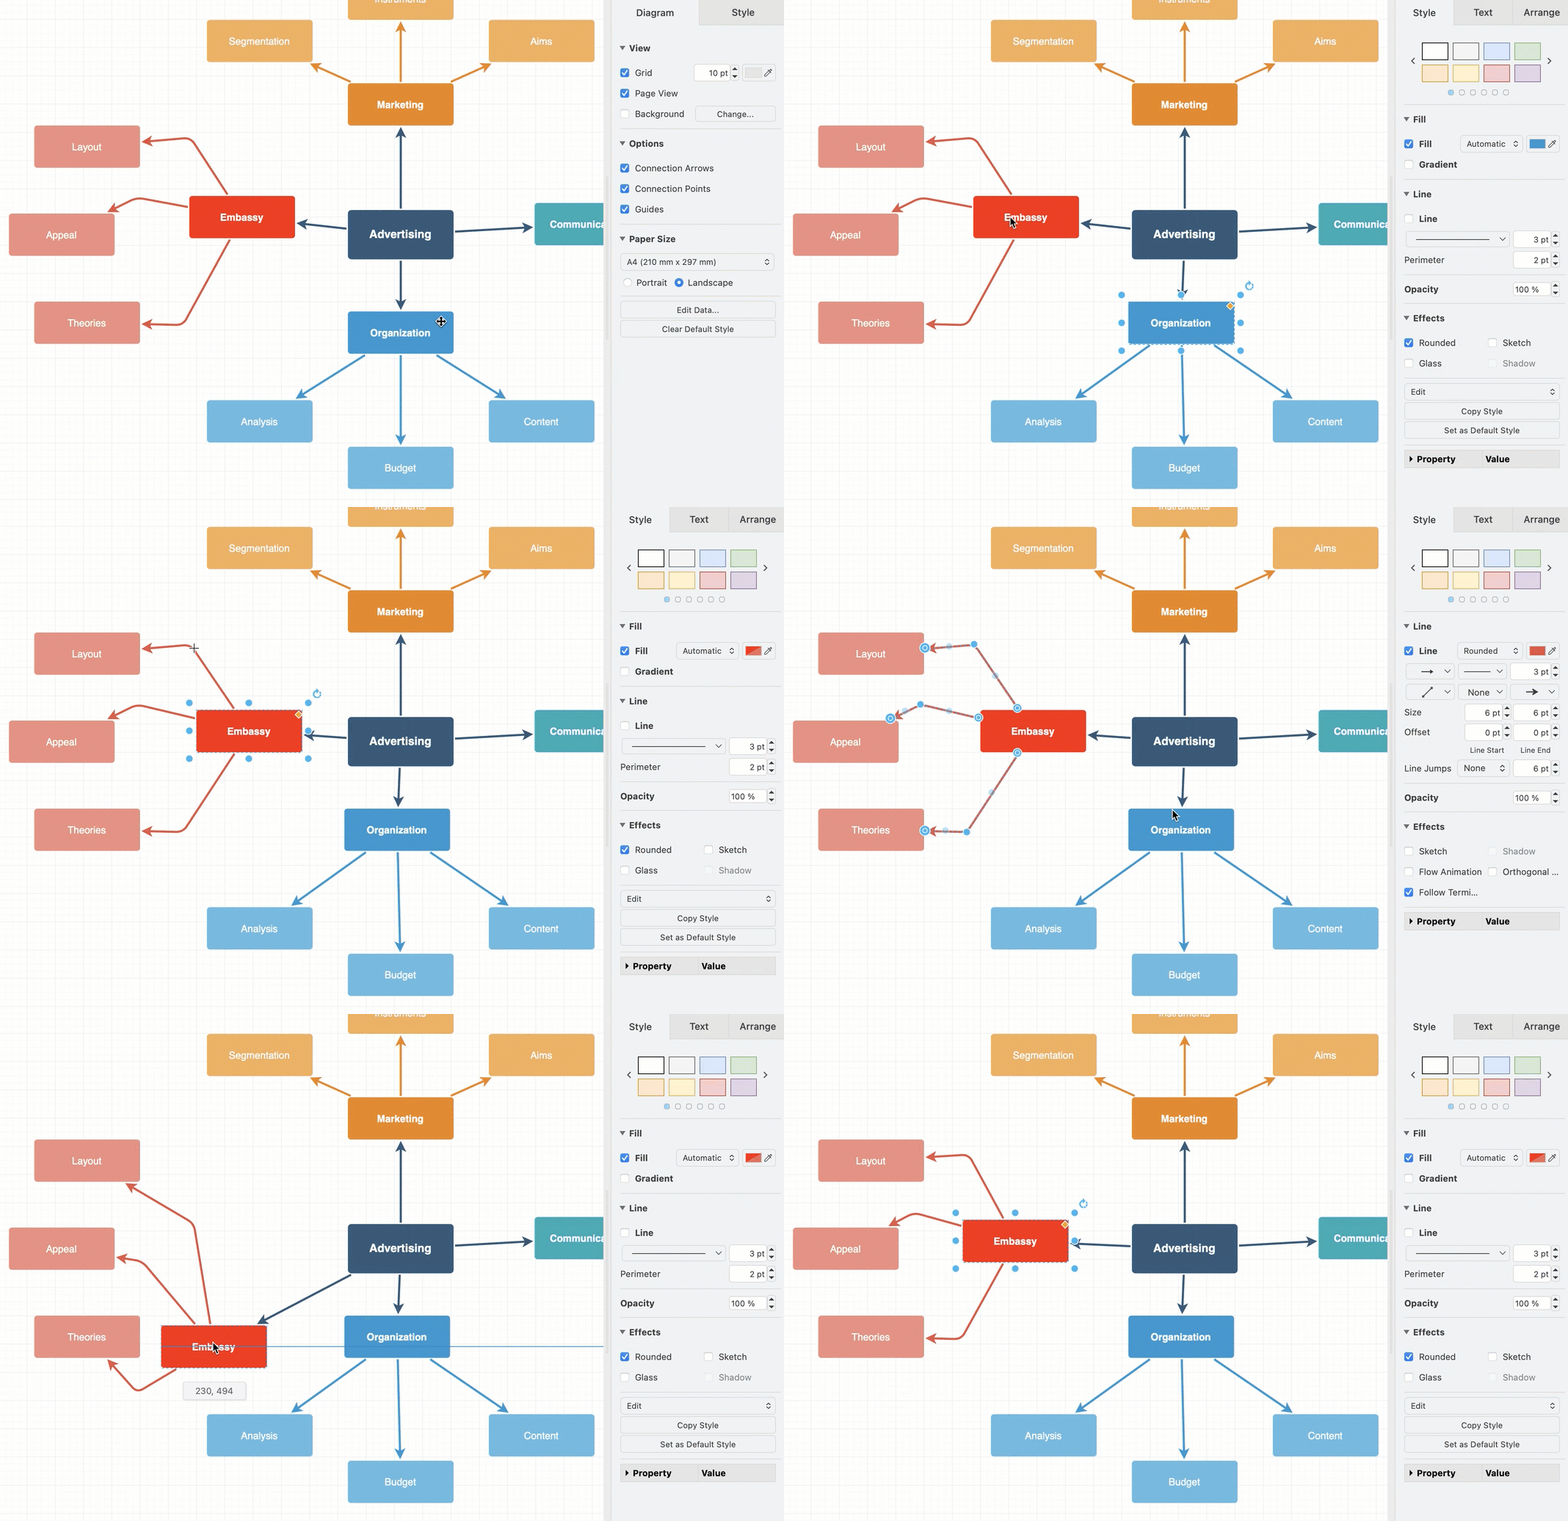
The connector's path will now move with its connected shapes as you move, resize or arrange them. Orthogonal connectors retain their right-angled bends and waypoints in other connector styles will keep their bends. This works well in mind maps and other diagrams where a connector's path is logically determined by its shapes.
Note: Straight connectors have no waypoints, so will not appear to behave differently when Follow Terminals is enabled.
Place waypoints precisely
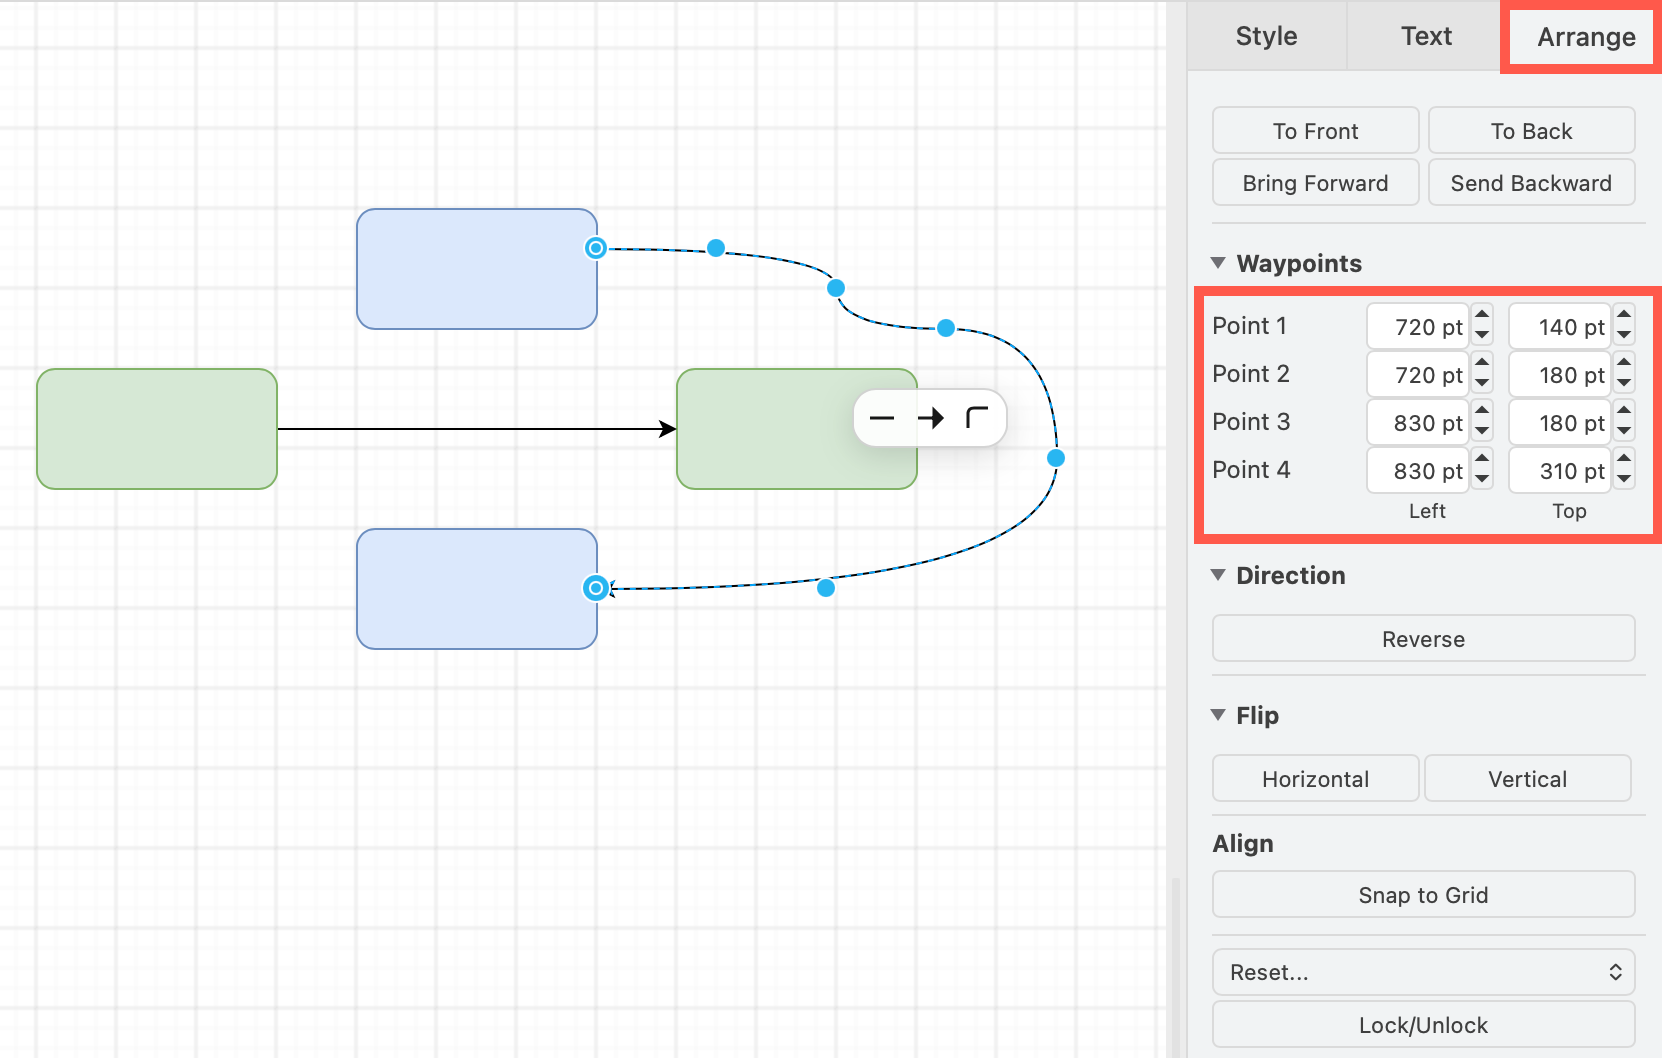
Use exact coordinates to line up the bends of several connectors.
- Select a connector that has waypoints.
- Open the Waypoints section in the Arrange tab of the format panel.
- Enter the Left and Top position of each waypoint.
Connectors attach more neatly
Connector attachment points with arrows or symbols could appear a little messy on shapes with rounded corners. Now, connectors will neatly attach to the curved outline and labels on those connectors will follow these curves. Additionally, the new Orthogonal Ends style, and the 45 degree guide will help you draw neater connectors.
Attach connectors to rounded shapes
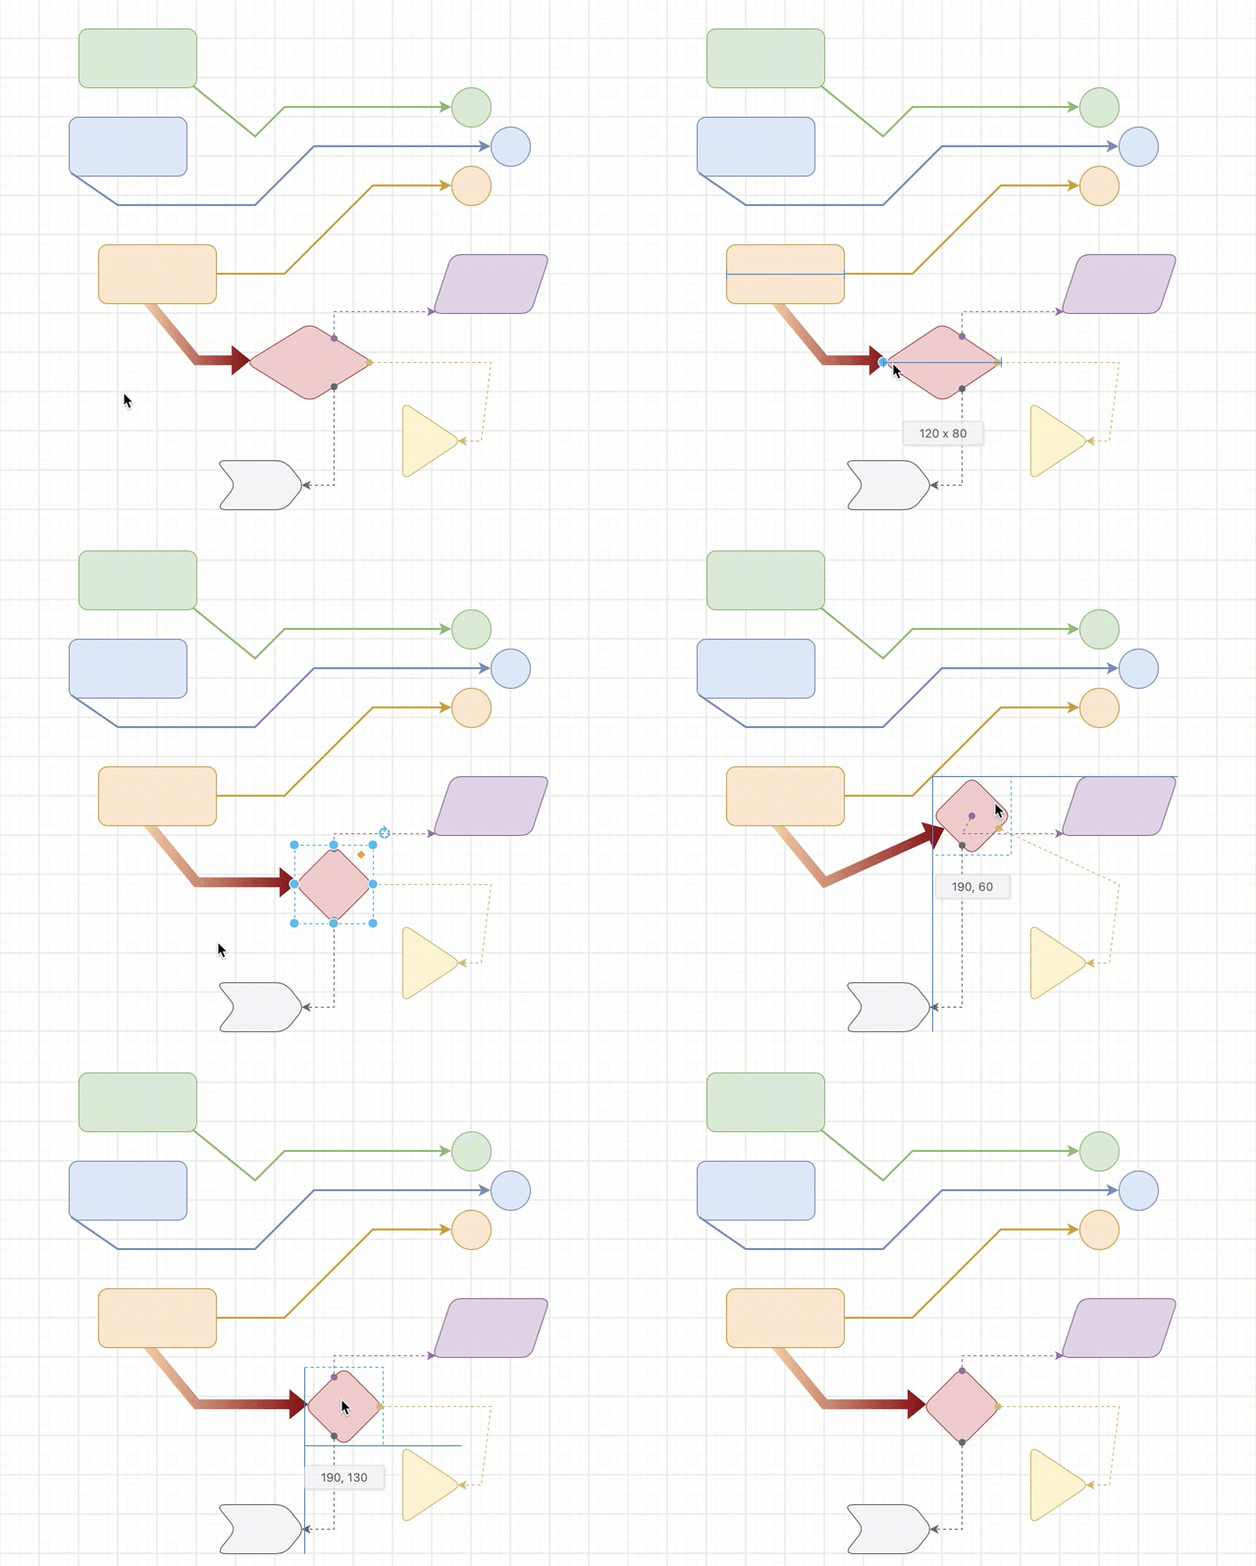
Connectors on the rounded shapes in the General shape library now sit on the curved outline, not offset from the shape outline on its invisible squared corners.
- Select or add a shape - any of the simple shapes in the General shape library or that can be added via the double-click shape selection tool.
- Select the Rounded checkbox in the Style tab of the format panel.
Rounded Perimeter will be turned on automatically in the shape properties. The connection points and connector ends will then automatically attach to the rounded corners for fixed and floating connectors.
Meet shapes at right angles
Force the ends of a straight or curved floating connector to attach to a source or target shape at a right angle for neater connector arrows.
- Select one or more floating connectors.
- Select the Orthogonal Ends checkbox in the Effects section in the Style tab of the format panel.
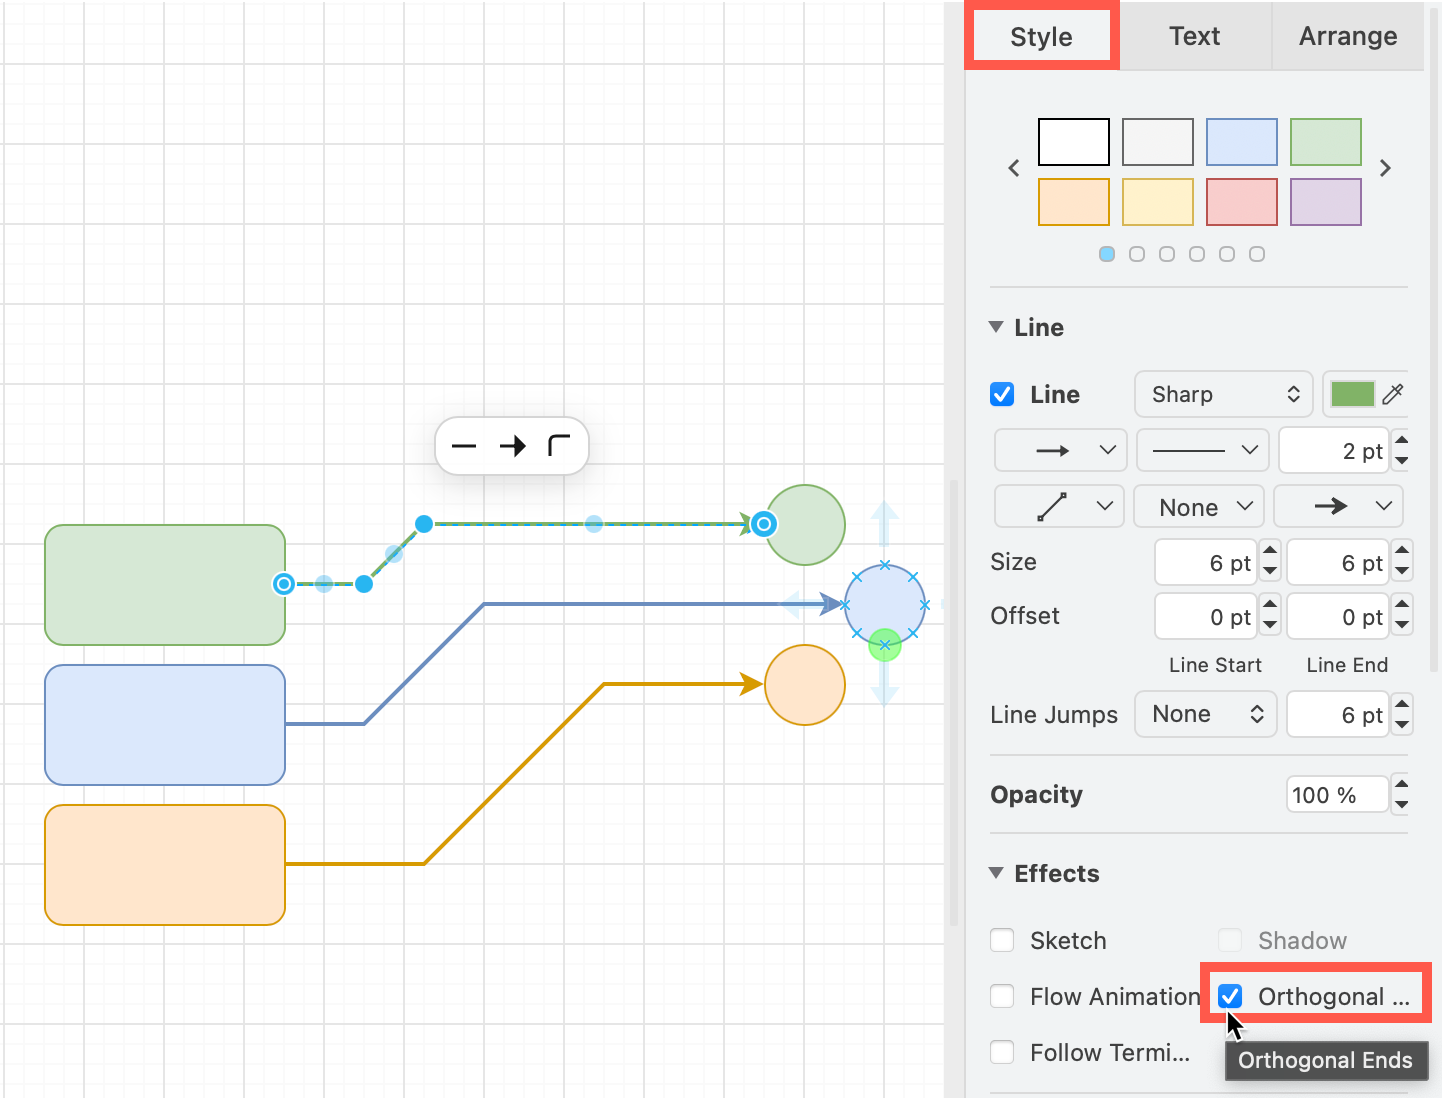
Note: This checkbox is only shown when the connector's waypoint style isn't orthogonal or isometric, and both ends are not attached to fixed connection points. Orthogonal connectors always meet shapes at right angles, and isometric connectors always attach at a 30 degree angle through the centre of the shape.
Draw parallel angled connectors
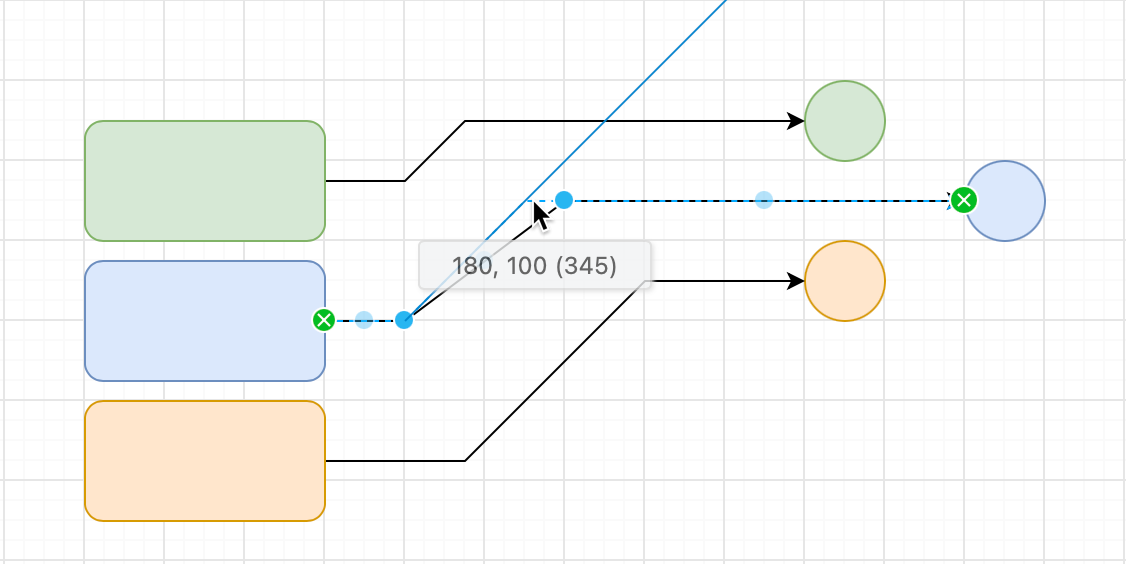
A 45 degree guide now appears when you drag the waypoints of a connector with the Straight waypoint style. Snap each segment to the guide for neat, parallel and consistent angled connectors throughout your diagram.
Improved labels on connectors
Drop text onto a connector
Drag a Text shape from the shape library and drop it onto a connector. The text will be added as a label at that point on the connector.
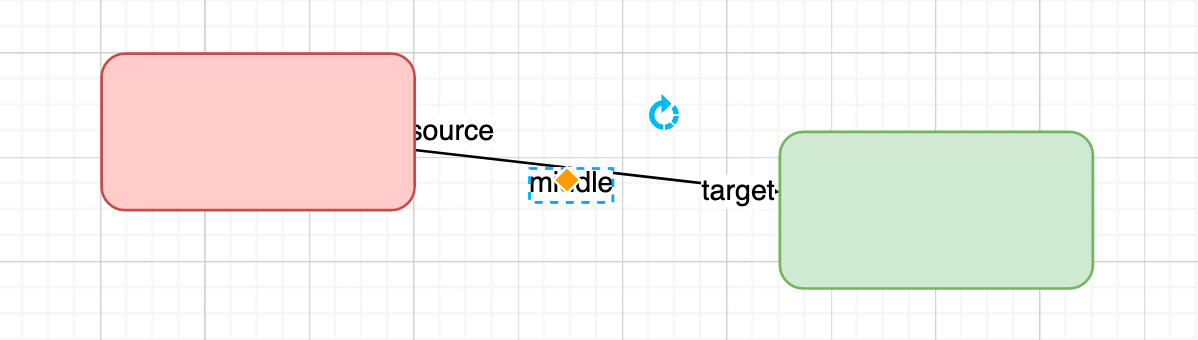
Learn how to label connectors.
Match label backgrounds to the page
Connector labels typically hide the line behind them with a solid background. On a coloured page, this used to show as a white or black box. Now the label background can use the page background colour instead.
- Select the connector.
- Open the Text tab in the format panel.
- Select Page Background under Background Color.
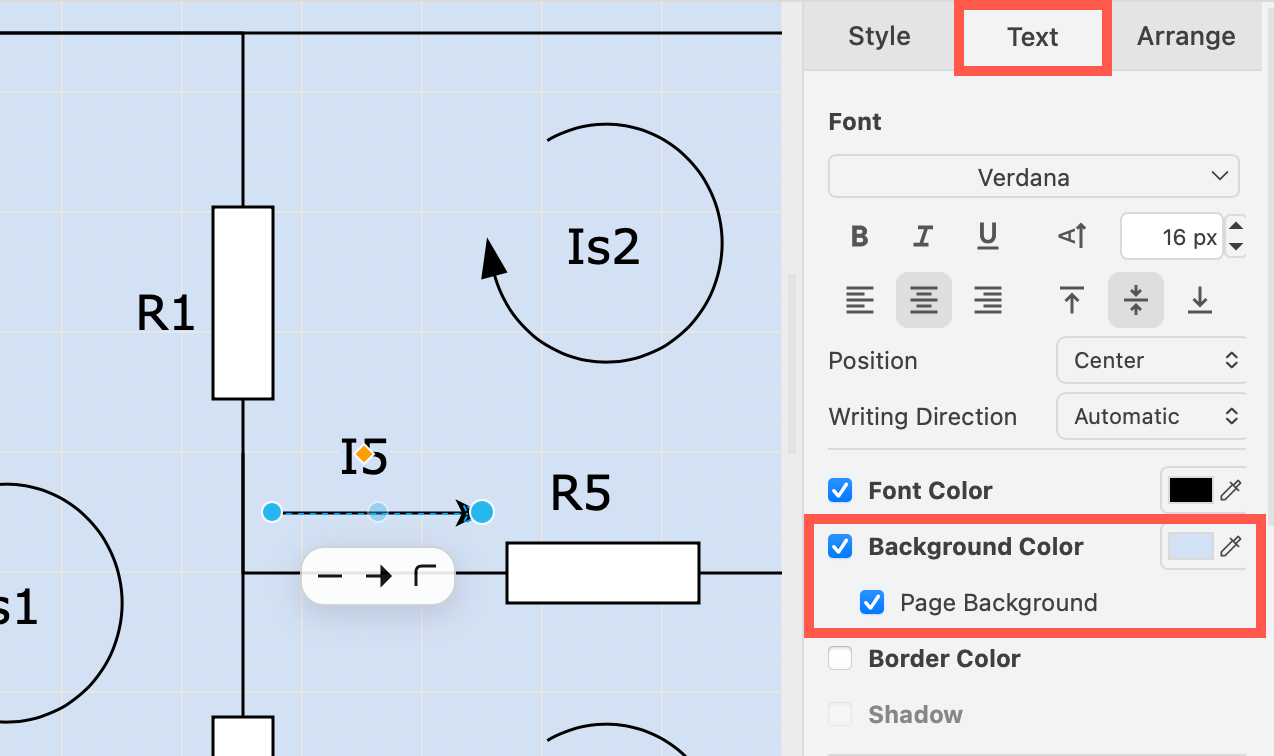
Labels with this enabled will also use the page background in dark mode.
Note: On gradient page backgrounds, this will use the first colour of the gradient.
Copy and paste connector labels
Copy the text of a label, along with its style, size and label background settings with keyboard shortcuts, then paste it on the same or another connector. The label will be pasted under the mouse cursor.
- Select a label on a connector.
- Copy it with
Ctrl+Con Windows,Cmd+Con macOS. - Move the mouse cursor over the connector where you want the new label.
- Paste it with
Ctrl+Von Windows,Cmd+Von macOS.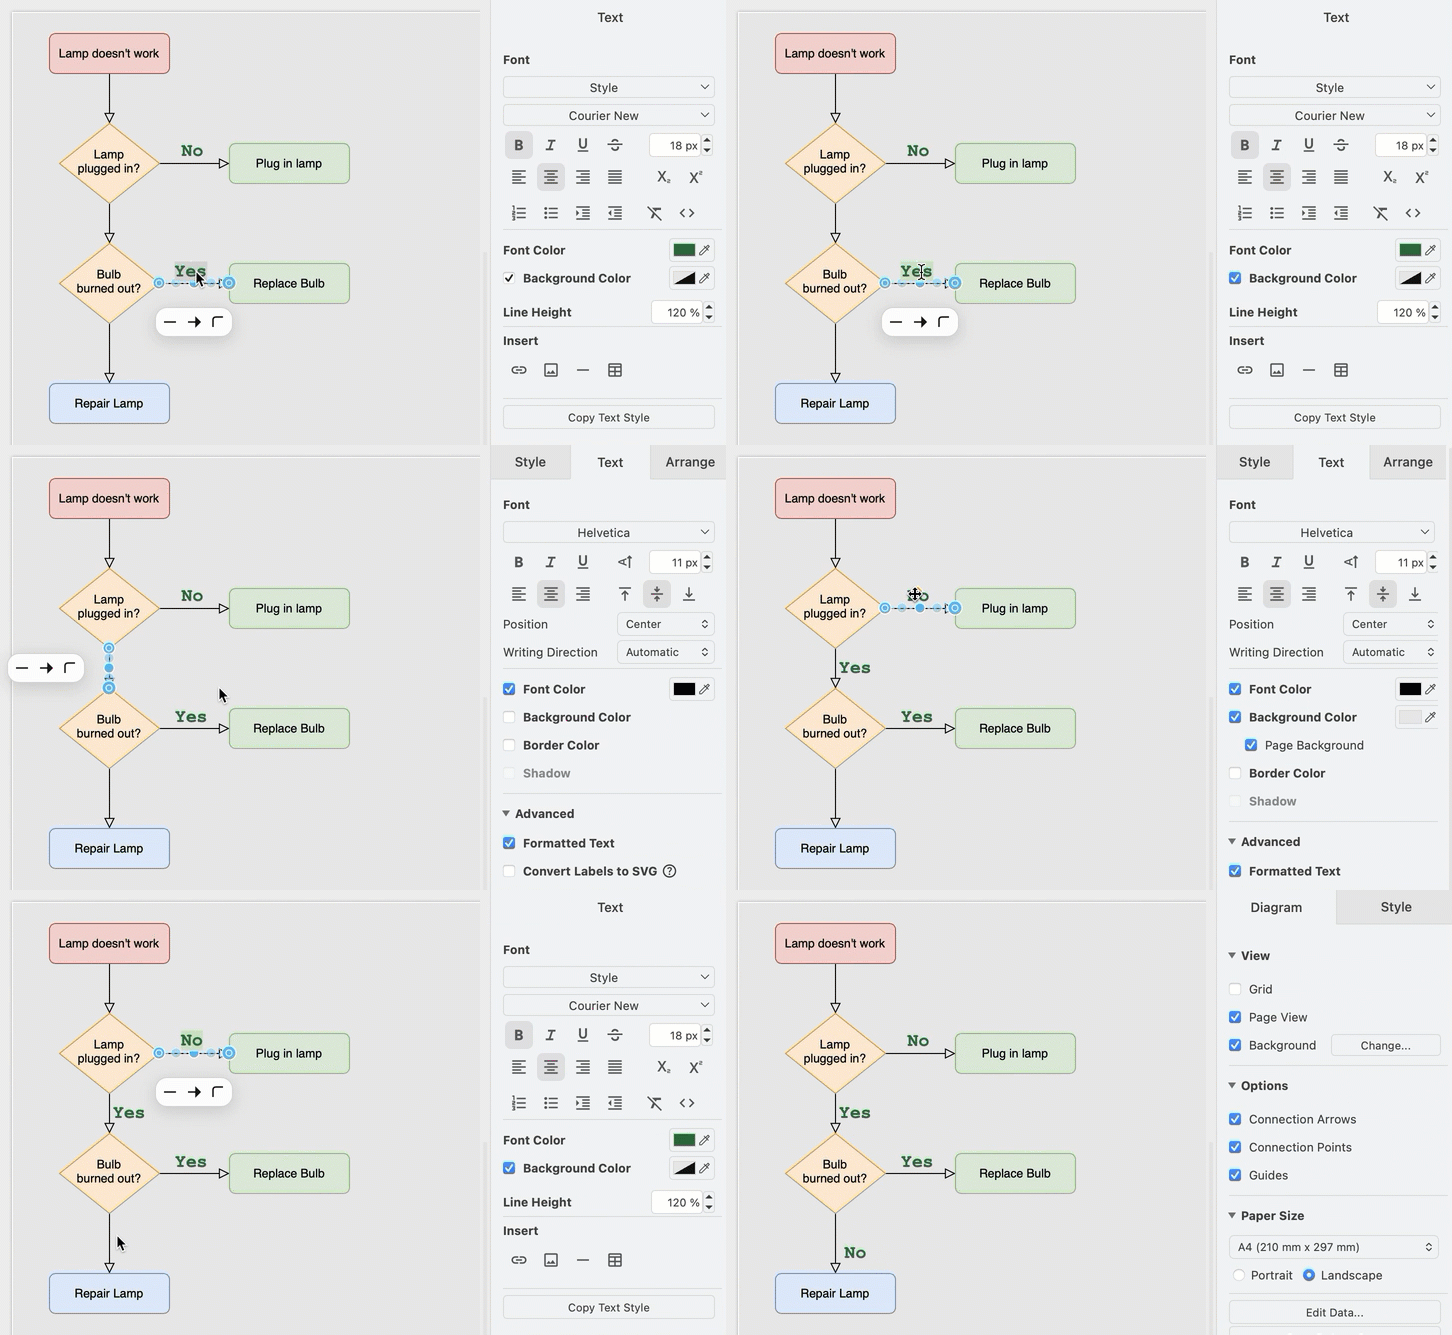
Related
Learn more about working with connectors and connector styles.